A lantern about the size of a large mug, cut from striped metal and locked
together with wedge-shaped tabs. No glue, no screws. Nobody has made one yet —
this is a design, and every number on this page was calculated rather than measured.
Schematic, not the cutting file. About 120 × 90 × 110 mm.
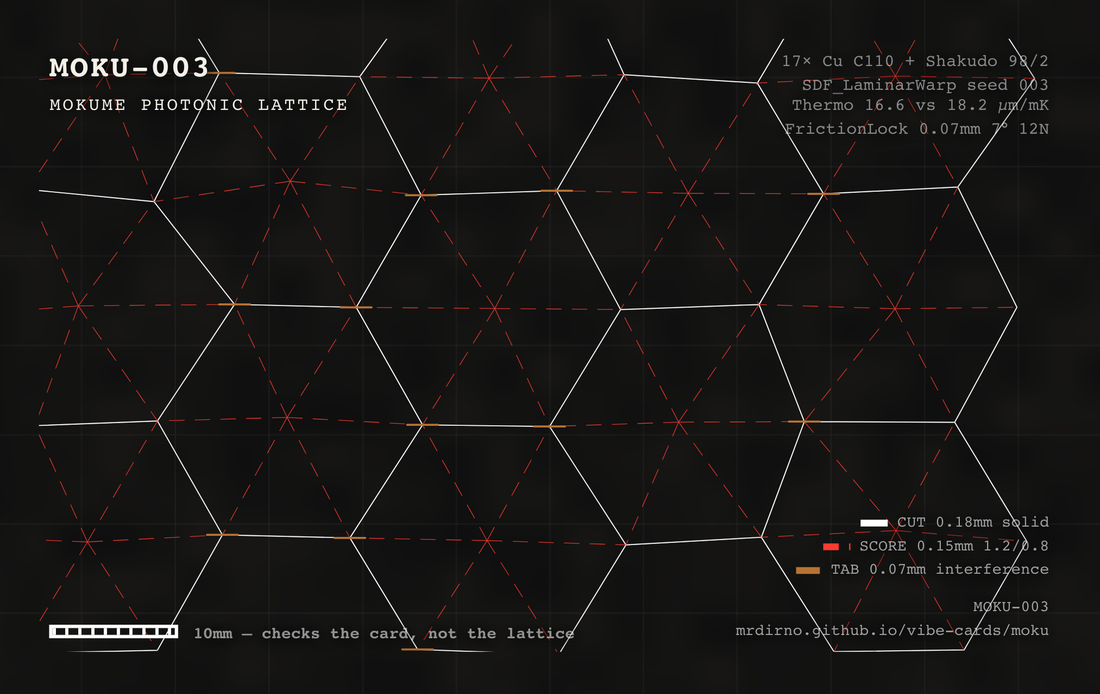
The back of the card shows the pattern, not the cut file — a card is
85.6 mm across and this is not. The file you cut from comes off this page.
FRONT · THE CODE OPENS THIS PAGEBACK
What it is
A lantern. Flat pieces of striped metal, cut full of holes, that slot into each other
and stand up into a box about 120 × 90 × 110 mm. Put a light inside and
the pattern falls across the room. Nothing is glued and there are no screws —
wedge tabs jam into their slots and hold.
The card calls it a Mokume Photonic Lattice, which is three hard words for a
striped metal lamp. Mokume-gane means “wood-grain metal”. You stack
sheets of two different metals, forge them into one solid block, then cut down into
the layers so the stripes surface as a pattern. Photonic here only means it is
about light. A lattice is a grid full of gaps.
The two metals are copper and shakudo. Shakudo is a Japanese alloy: 98% copper,
2% gold. Treated, it goes a deep blue-black. That dark stripe against bare copper is
the whole look.
The pattern cut into it is kumiko — Japanese latticework put together
without nails — in the asanoha or “hemp leaf” pattern, a
six-pointed star repeated across a grid. It is one of the oldest patterns in the craft.
Every number, in one list
SIZE
about 120 × 90 × 110 mm assembled
SHEET
0.8 mm thick · cut 1:1, in millimetres
LAYERS
17 · 0.9 mm copper alternating with 0.6 mm shakudo
SHAKUDO
98% copper, 2% gold · patinas blue-black
CELL
asanoha hemp leaf · 21 mm across, adjustable 18–24 mm
EXPANSION
copper 16.6 · shakudo 18.2, estimated · µm per metre per kelvin
OPENING
0.30 mm at +40 °C — claimed, never measured
TAB
0.07 mm oversize · 7° wedge · no glue
HOLD
12 newtons of shear — calculated, never tested
LICENCE
MIT
The lattice opens when it warms
This is the good part, and it is the reason this design exists rather than being a
nice lamp with holes in it.
Metals get longer when they get hotter, and different metals get longer at different
rates. Every rib in this lattice is copper on one side and shakudo on the other. Warm
it up and the two sides no longer match, so the rib changes shape and the hole beside
it opens.
A rib — the drawings call it a ligament — is one thin strip of metal
between two holes. Six of them ring each cell.
One cell. The six thick lines are the ribs, and each one pushes outwards as
it warms. The push is far too small to draw here — that is what the bars below
are for.The sum, drawn to scale
Here is the sum. It uses a strip 150 mm long — a piece running right
across a face, not the short bar between two neighbouring holes. Warm it by
40 °C and the copper side gets 0.0996 mm longer. The shakudo side gets
0.1092 mm longer. The difference is 0.0096 mm.
Copper: how much longer a 150 mm rib gets0.0996 mm
Shakudo: the same rib, the same heat0.1092 mm
The difference — one rib0.0096 mm
Six ribs, added up0.0576 mm
A human hair, for comparisonabout 0.07 mm
What the design package claims the cell opens0.30 mm
Every bar is drawn to the same scale. The full width of the box is
0.35 mm. The last bar is dashed because it is a claim, not a result.
Six times 0.0096 is 0.0576 mm. The design package writes 0.30 mm
one line later. Both numbers are in the source and only the small one follows from the
rule printed beside it.
Nothing has been built, so no measurement settles it. What is certain is the direction:
warm this lattice and it opens a little. How little is an open question, and it is the
most useful thing anyone could send back to this page.
How to build it
A METAL SHOP, NOT A KITCHEN TABLE
The nine steps, from 17 sheets to a lamp
Find the shop first
This step decides whether you can build this at all, so it is first. You need a
20-tonne press, a furnace that holds 450 °C,
an etching bath and a laser cutter. A school metal
shop, a makerspace or a jeweller has these.
If that list is not available to you, skip to Build it in one
metal below. You get the lantern and the locking tabs today. You do not get
the opening.
Stack 17 layers, alternating
Sheets 120 × 90 mm. Copper 0.9 mm, shakudo 0.6 mm, one then the
other, 17 sheets in all. Count them as you go and measure the stack
with a ruler — the paperwork and the layer count disagree here, and the ruler
wins.
Press the stack into one sheet
Cold press it under 20 tonnes until it is 0.8 mm thick. Nothing
melts. The layers weld to each other under pressure and become one piece of metal,
and the stripes stretch out as it spreads.
Anneal it at 450 °C for 22 minutes
Pressing leaves metal hard and brittle. Heating it and letting it cool makes it soft
enough to work again. Do this before you cut, not after — a
brittle sheet cracks at the thin ribs, which is most of what this sheet is.
Etch it to bring the stripes up
Ferric chloride, 30%, about 8 minutes. The two metals dissolve at different speeds,
so the layers stop being invisible and become a surface you can see and feel. This
is the step that turns a grey sheet into wood grain.
Cut the lattice
Laser, on the 0.8 mm sheet. White solid lines are cuts, red dashed lines
are scores, copper is a tab. The file already allows 0.08 mm for the
width of the beam, so cut it exactly as drawn and do not add an offset of your own.
File the wedge on each tab
Every tab is drawn 0.07 mm wider than its slot — about the
thickness of a hair — and tapers at 7 degrees. That taper is
the whole trick: the tab jams instead of sliding. File to the line and stop.
7° WEDGE
The taper is drawn at its true 7 degrees. The
0.07 mm of extra width is not drawn at all: at this size it would be less than
half a pixel.
Push the tabs home. No glue.
They are meant to jam. Push each tab until it stops and leave it there. The
calculation says one joint holds 12 newtons — about a bag of
sugar hanging off it — but that is a calculation, and nobody has pulled one
apart to find out.
Warm it, and measure
A 200 W halogen lamp 150 mm away raises it about 40 °C. That is the
moment this whole design is about. Put a caliper across one cell before and after.
Whatever number you get, put it in the wishing well at the bottom
of this page. Nobody has this number. You would be the first person to
measure it.
Build it in one metal
You probably do not have a 20-tonne press. You can still build this today, and it is
worth saying plainly: the cut file is just a shape. Run it in any 0.8 mm
sheet you can actually get hold of — brass, aluminium, even heavy card — and
you get a lantern.
What you keep and what you lose
WHAT YOU KEEP
The lattice, the hemp-leaf pattern, the light it throws.
The friction lock. The 7° wedge and the 0.07 mm of
interference work in any stiff sheet. No glue, no screws, same as the original.
A finished object, in an afternoon, on a laser cutter or with a scalpel.
WHAT YOU LOSE
The opening. That is the one thing that needs two metals. One metal
expands evenly, so the rib stays the shape it was and the hole does not change.
The stripes. Those are two metals as well. A single sheet is a single colour.
ONE CAUTION IF YOU USE CARD
Card is soft. The tab will hold, but nothing like 12 newtons, and an interference fit
that jams in brass will crush in card. Cut one tab and one slot first, push them
together, and adjust before you cut the whole sheet.
Reading the sheet
FOUR MARKS, AND THEY MEAN DIFFERENT THINGS
Solid whiteCut line. All the way through the sheet.
Dashed redScore line. A groove, not a cut. Do not go through.
CopperA tab. Cut 0.07 mm oversize on purpose, so it jams.
The ruler10 mm, ticked every millimetre. Check it first.
The swatches are drawn on a dark ground because that is where you will meet
them — on the sheet itself, in the sheet’s own white, red and copper.
What is calculated and what is measured
Nobody has measured any of this. Here is exactly where that matters, in order of how
much it would change what you get.
The eight places it matters, in order
Nothing has been built. Nobody has stacked the layers, pressed them, cut a
lattice or warmed one up. Every number here comes out of a calculation — the
0.30 mm, the 12 newtons, all of it.
One of the two key numbers is a guess. Copper’s 16.6 comes from the ASM
Handbook. Shakudo’s 18.2 comes from nowhere: there is no published figure for
it, so it was estimated. The opening depends entirely on the gap between those two.
Two tests read as though they happened. The package’s evals file reports
an Instron 68SC slip test with no qualifier at all, and an infrared dilatometry run
it marks “simulated” and then calls “measured” twice in the
same line. Its own README says neither was performed. The README is the honest one.
Six times 0.0096 is 0.0576, not 0.30. Both numbers sit in the source, a line
apart. Only the small one follows from the rule printed beside it, and no measurement
exists to decide between them.
The 150 mm in that sum is longer than the lantern. It is about the diagonal
across one face. The cells sit 21 mm apart, and the metal between two of them is
nowhere near 150 mm long. Which length belongs in the sum is not written down
anywhere.
Seventeen layers do not add up to 25.5 mm. At 0.9 and 0.6 mm
alternating, seventeen sheets is about 13 mm. 25.5 is what seventeen pairs
would be. Measure your own stack rather than trusting either number.
The friction number came from wood. The 12 newtons uses 0.34 for friction, which
is a figure for dry wood against metal. Both sides of this joint are metal. It may be
close. Nobody has pulled a tab out to find out.
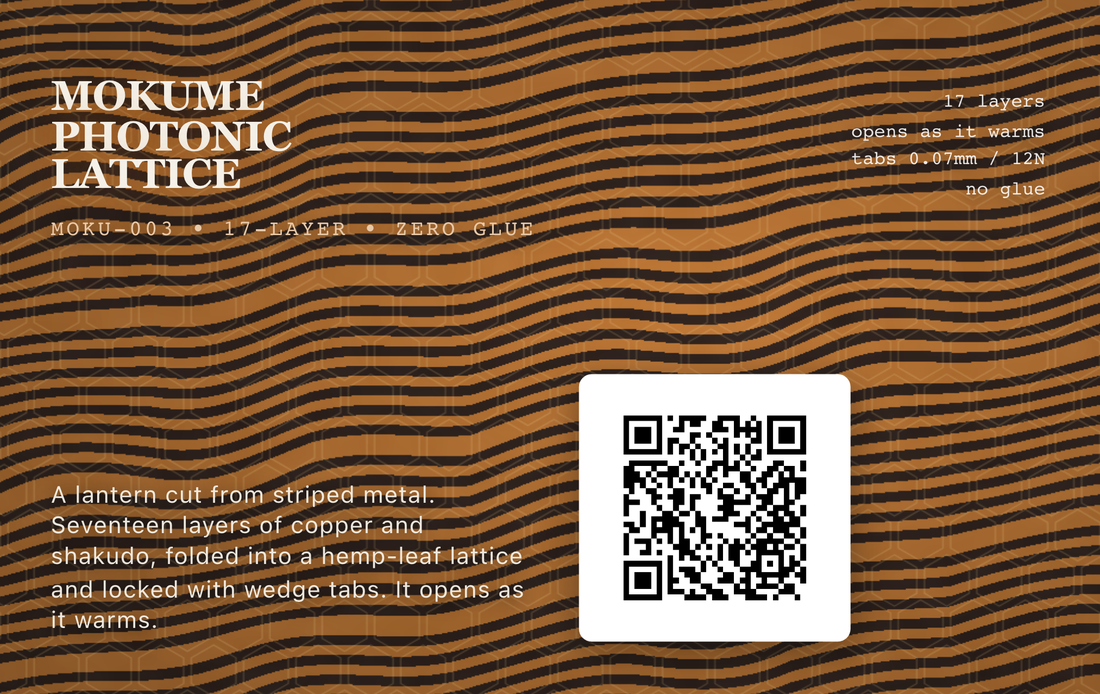
The stripes on the front of the card are drawn, not photographed. A program made
that pattern. There is no block of metal anywhere, so there was nothing to photograph.
The back of the card is the lattice as the program draws it, which is the
nearest thing here to a photograph of the object.
None of this makes the design wrong. It makes it untested, which is a
different thing, and the difference is worth a whole section on the page a stranger
reads.
Licence
This card is MIT. Do what you like with it, including sell it, as long as the
copyright line travels with it. Cards 001 and 002 in this book are CC BY-NC, which
forbids selling. This one is not, and that is not an oversight — its author set it
to MIT and it was left the way they set it.
MIT also says there is no warranty of any kind. On a design nobody has built, read that
line twice.
The chip carries that line in plaintext, next to the address. It needs no
server and no network to say what this card is — so if this page ever dies, the
card still knows.
PRINT IT YOURSELF — this card is a
template in Card Studio, the same free app
that printed the original. It opens holding this card, both faces.
The log
This card’s address can never change, so anything new about it has to land here:
corrections, a metal that turned out to work, a tab size that turned out to be wrong.
Tap the card again in a month and there should be something on this page that is not on
it today.
The first entry this page is waiting for is a number off a caliper.
What has landed so far
2026-08
The package checks itself against a list that has gone out of date
The package includes a list of its own files, with a fingerprint for each, so you can check nothing has changed. That list is now out of date: files moved and this page grew, but the drawings and the card's QR code still work.
2026-08
There are two cut files, and they disagree
Two programs in this package write the cut file, and they do not draw the same sheet. The export button marks both sides of every cell and adds a 10 mm ruler; the script in tools/ marks one side and adds none.
2026-08
Nothing in the file allows for the beam
This page says the file already allows 0.08 mm for the laser beam, but neither program that writes it applies any offset. Cut one hexagon, measure the hole, then set your own offset.
Want it changed?
Ask for anything. A one-metal version with the tabs already resized, a flat
panel instead of a box, a smaller lantern, the cut file in a format your laser cutter
likes, a shopping list with sheet sizes on it. Whatever would make it work for you.
No account, no email, nothing to sign up for. Just write and tap. It goes
into a queue someone works through, not into an inbox.